Tutorials
This section explains the functionalities of CO2MPAS GUI through some video tutorials:
Inputs
This section shows the utilities to generate and populate the CO2MPAS input file.
Get input template
Check the video to see how to download an empty input excel-file. The generated
file contains the instructions on how to fill the required inputs. For more
information use the command co2mpas template -h or check the
link.
Synchronize time-series
If you have time-series not well synchronized and/or with different sampling
rates, the model might fail. As an aid tool, you may use the syncing tool to
“synchronize” and “re-sample” your data. To use the tool you should execute the
following steps:
Generate and download an empty input excel-file (see the video). For more information use the command
co2mpas syncing template -hor check the link.Note
All sheets must contain values for columns
timesandvelocitiesbecause they are the reference signals used to synchronize the data with the theoretical velocity profile.Run data synchronization, see the video. For more information use the command
co2mpas syncing sync -hor check the link.
Note
The synchronized signals are saved into the synced sheet.
Download demo files
CO2MPAS contains 4 demo-files that can be used as a starting point to try out:
- co2mpas_conventional.xlsx: conventional vehicle,
- co2mpas_simplan.xlsx: sample simulation plan,
- co2mpas_hybrid.xlsx: hybrid parallel vehicle,
- co2mpas_plugin.xlsx: hybrid plugin vehicle.
Check the video to see how to download them. For more information use the
command co2mpas demo -h or check the
link.
Run
This section displays three ways to run CO2MPAS. For more information use
the command co2mpas run -h or check the
link.
Type approval mode
The Type Approval command simulates the NEDC fuel consumption and CO2 emissions of the given vehicle. To produce the NEDC predictions, CO2MPAS utilizes only the declaration inputs. If it finds some extra/missing inputs, a warning is raised and no results are produced. To successfully run CO2MPAS in type approval mode, see the following steps:
- Upload your file/s (multiple files are accepted):
- Switch TA mode ON and click run:
- Get the results:
Output files of the type-approval run.
A zip folder per vehicle, named as
<ip-name>.co2mpas.zip. This contains 4 files:<ip-name>.co2mpas.hash.txt: Contains the correlation hash.<ip-name>.co2mpas.input: Raw CO2MPAS input file.<ip-name>.co2mpas.output: CO2MPAS results.<ip-name>.co2mpas.ta: Correlation output report to be uploaded on dice server.
A summary file, named as
<timestamp>-summary.xlsx, that contains the relevant output results.
Engineering mode
This section explains how to run CO2MPAS in engineering mode:
- Upload excel file/s (see previous video),
- Switch TA mode ON and click run:
Note
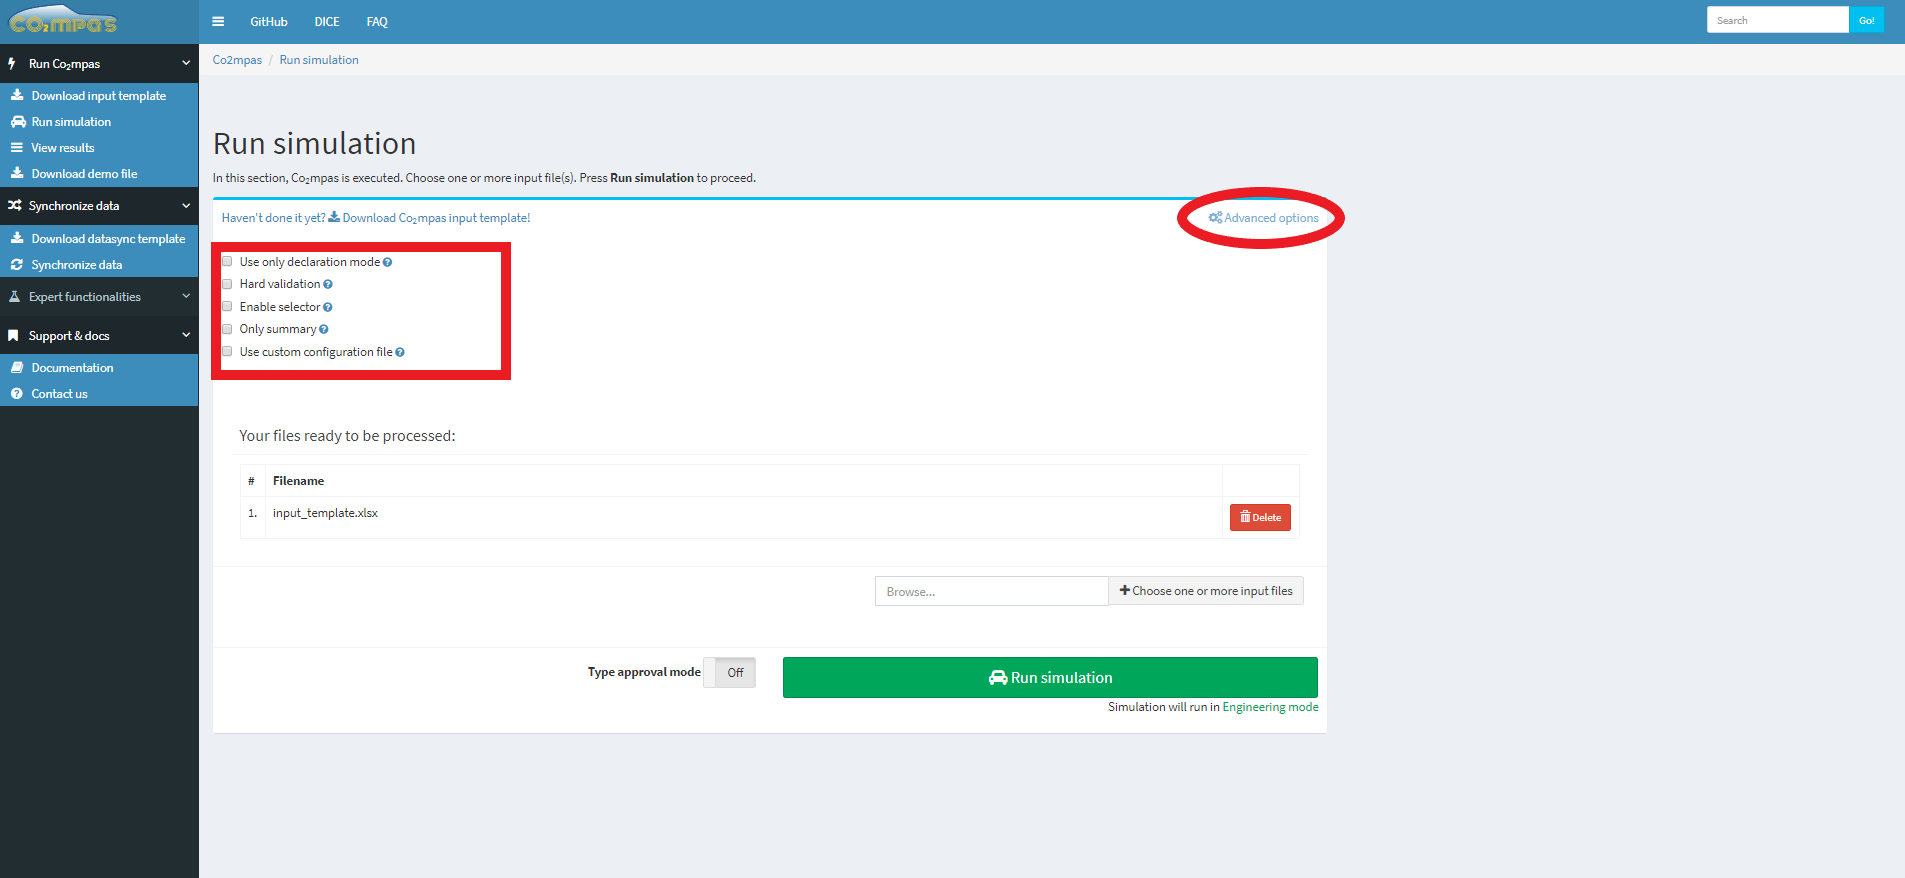
5 advanced options are available: use only declaration mode, hard validation, enable selector, only summary, and use custom configuration file. Flag the box to activate them.
- Get the results (see the previous video).
Output files of engineering mode run.
- A CO2MPAS output per file, named as
<timestamp>-<file-name>.xlsx. - A summary file like above.
Physical model configuration file
The configuration file (.yaml) is used to overwrite the default variables of the physical model.
Input file:
- download the conf.yaml template from the GUI as shown in the image below.
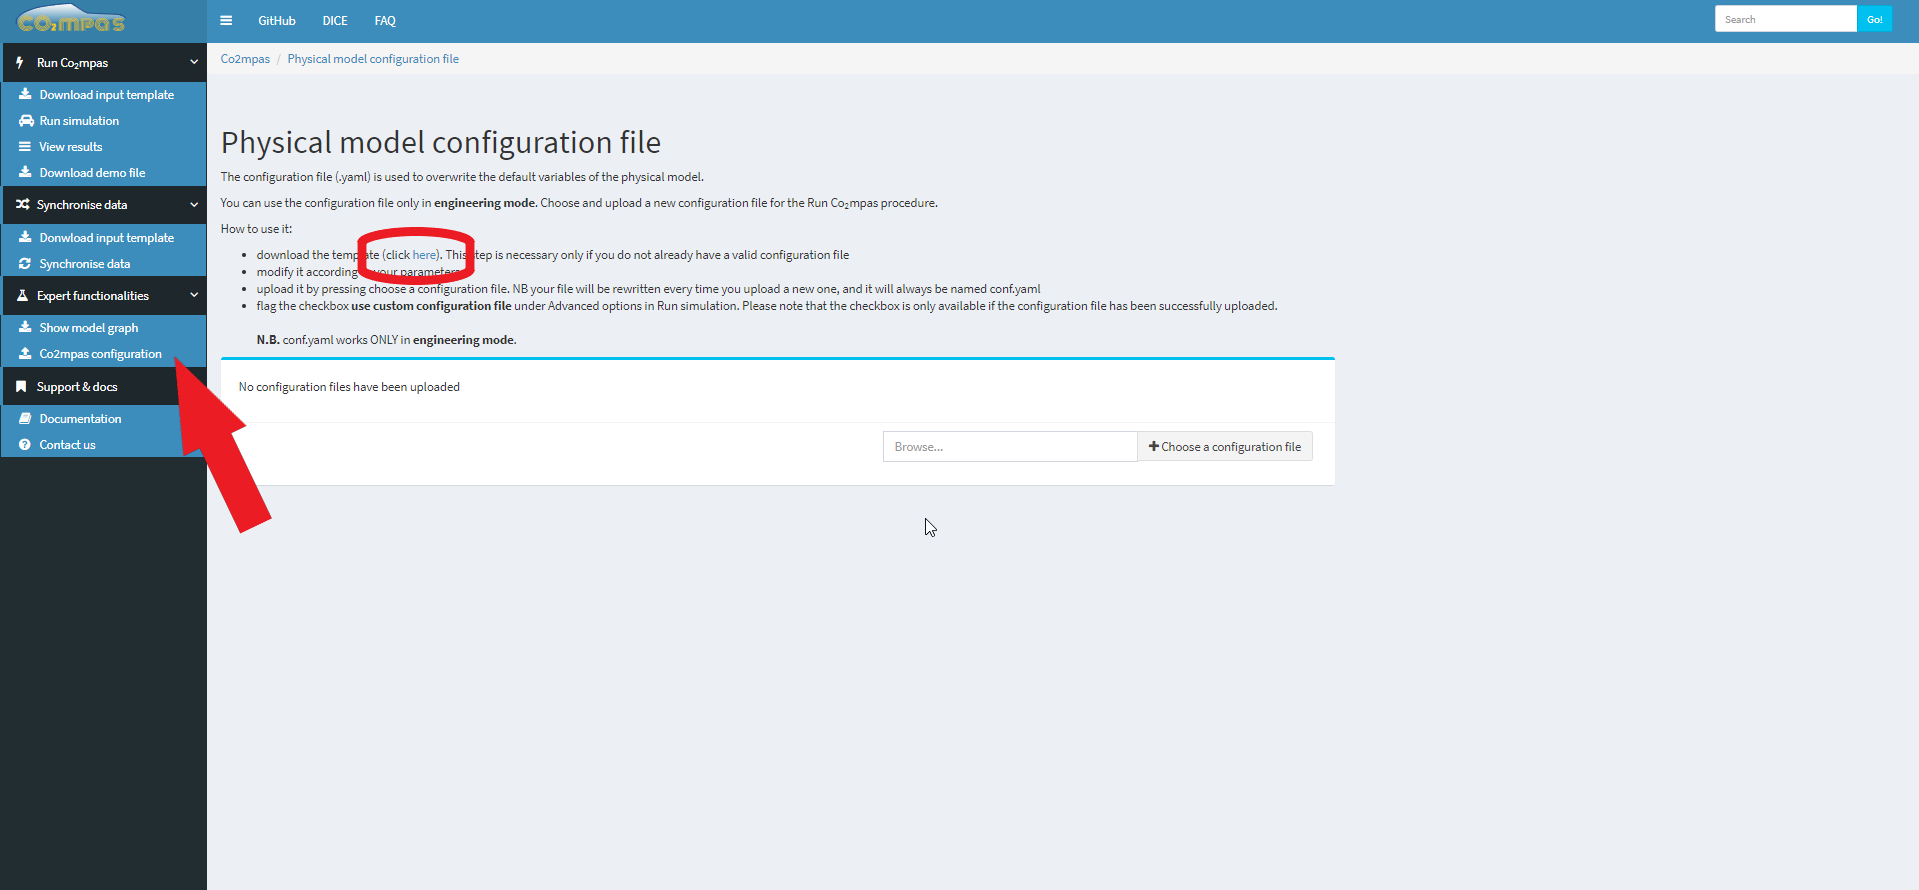
- modify it according to your parameters.
How to use it:
- Upload a new configuration file as shown in the picture.

- Flag the checkbox use custom configuration file under Advanced options.
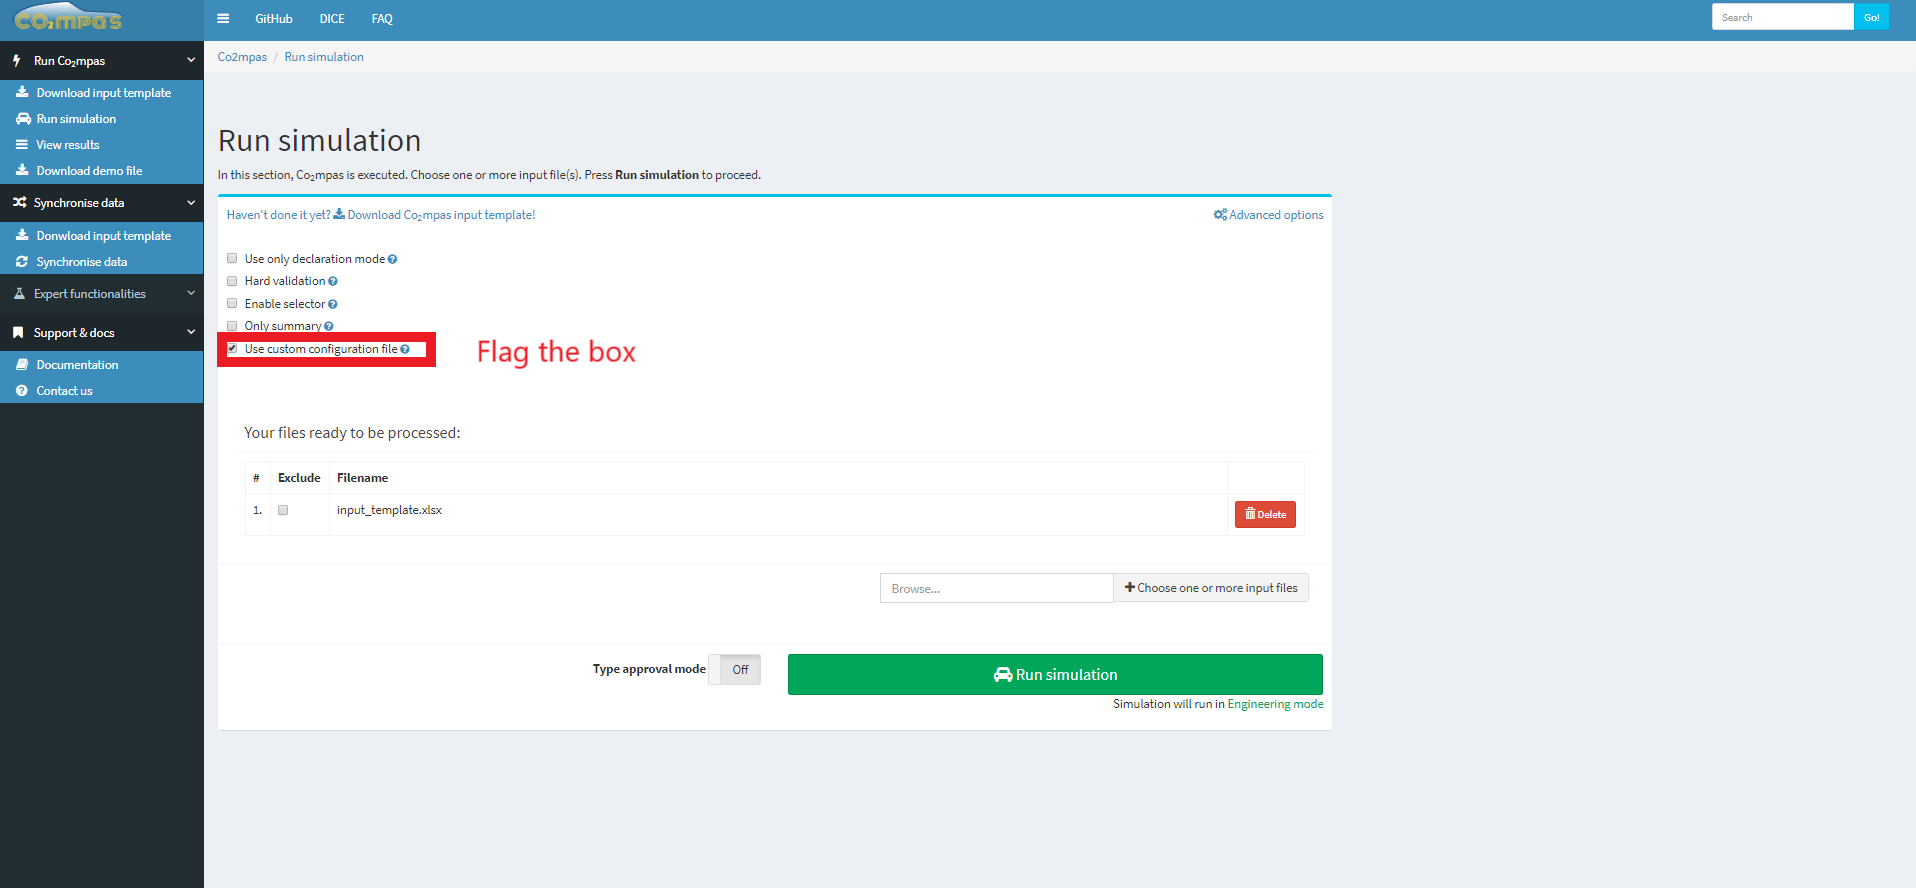
- Run you input file as described in the Engineering mode section.
conf.yaml
- conf.yaml works ONLY in engineering mode.
- the file will be rewritten every time you upload a new one, and it will always be named conf.yaml
Simulation plan
The simulation plan is an input file containing some extra parameters/sheets
with a scope plan. (see data naming convention). It
defines the list of variations (i.e., inputs to be overwritten) that have to be
applied to a base dataset (i.e., a normal input file of CO2MPAS).
The simulation plan can save you time! It is able to calibrate the models
just once and re-use them for other subsequent predictions, where only some
inputs are different (e.g., times, velocities, vehicle_mass, etc.).
To run the simulation plan upload it as an input file, and run it as described in the previous section (i.e., Engineering mode).
Output files
Note
The simulation plan cannot run in type-approval mode.
Model plot
This section shows the utility to investigate the CO2MPAS model. For more information check CO2MPAS Model and API Reference.